もう世の中のあらゆる人間がオレオレ証明書を発行する記事等は書いていると思いますが、自分はこうやったぜっていう方法を残しておくために書きます。
このブログは前のブログの続きです。

動作環境
- Ubuntu 20.04.4 LTS on Virtual Box
- Apache 2.4.41
- OpenSSL 1.1.1f
手順
OpenSSLはインストール済みとする
秘密鍵の作成
権限の関係で面倒なのであらかじめrootになる。
$ sudo -s/etc/ssl/privateに移動(ここがroot権限じゃないと入れなかった)
# cd /etc/ssl/private秘密鍵の作成
今回はaes256、4096ビットにした
パスフレーズの入力を求められるので適当に入力する
# openssl genrsa -aes256 -out server.key 4096
Generating RSA private key, 4096 bit long modulus (2 primes)
...................................................++++
....++++
e is 65537 (0x010001)
Enter pass phrase for server.key:
Verifying - Enter pass phrase for server.key:
CSRの作成
CSRの作成
先に設定したパスフレーズを求められるので入力する
国とかの項目も適当に入力する
# openssl req -new -key server.key -out server.csr
Enter pass phrase for server.key:
You are about to be asked to enter information that will be incorporated
into your certificate request.
What you are about to enter is what is called a Distinguished Name or a DN.
There are quite a few fields but you can leave some blank
For some fields there will be a default value,
If you enter '.', the field will be left blank.
-----
Country Name (2 letter code) [AU]:JP
State or Province Name (full name) [Some-State]:Tokyo
Locality Name (eg, city) []:AdachiKu
Organization Name (eg, company) [Internet Widgits Pty Ltd]:
Organizational Unit Name (eg, section) []:
Common Name (e.g. server FQDN or YOUR name) []:localhost
Email Address []:

Please enter the following 'extra' attributes
to be sent with your certificate request
A challenge password []:
An optional company name []:
証明書の作成
とりあえず10年持つ証明書を作成する
ここでもパスフレーズの入力を求められるので入力する
# openssl x509 -in server.csr -out ../certs/server.crt -req -signkey server.key -days 3650
Signature ok
subject=C = JP, ST = Tokyo, L = AdachiKu, O = Internet Widgits Pty Ltd, CN = localhost
Getting Private key
Enter pass phrase for server.key:
Webサーバー(Apache)の設定
/etc/apache2/sites-available/default-ssl.confを開いて編集
# vim /etc/apache2/sites-available/default-ssl.conf

#32, 33行目
SSLCertificateFile      /etc/ssl/certs/server.crt
SSLCertificateKeyFile /etc/ssl/private/server.key
SSL設定
# a2ensite default-ssl
Enabling site default-ssl.
To activate the new configuration, you need to run:
  systemctl reload apache2

# a2enmod ssl
Considering dependency setenvif for ssl:
Module setenvif already enabled
Considering dependency mime for ssl:
Module mime already enabled
Considering dependency socache_shmcb for ssl:
Enabling module socache_shmcb.
Enabling module ssl.
See /usr/share/doc/apache2/README.Debian.gz on how to configure SSL and create self-signed certificates.
To activate the new configuration, you need to run:
  systemctl restart apache2
Apache再起動
再起動時パスフレーズの入力を求められるので入力する
毎回入力するのが面倒なら後述のコマンドでパスフレーズを解除する
# systemctl restart apache2
Enter passphrase for SSL/TLS keys for 127.0.1.1:443 (RSA): *******
パスフレーズ解除(やらなくてもよい)
ここでもパスフレーズの入力を求められるので入力する
# openssl rsa -in server.key -out server.key
Enter pass phrase for server.key:
writing RSA key
http通信をhttpsにリダイレクト(やらなくてもよい)
いつでもhttpsで通信したい人は以下の設定を行なう
# vim /etc/apache2/sites-available/000-default.conf
# 28行目以降に追記
RewriteEngine On
RewriteCond %{HTTPS} off
RewriteRule ^(.*)$ https://%{HTTP_HOST}%{REQUEST_URI} [R=301,L]
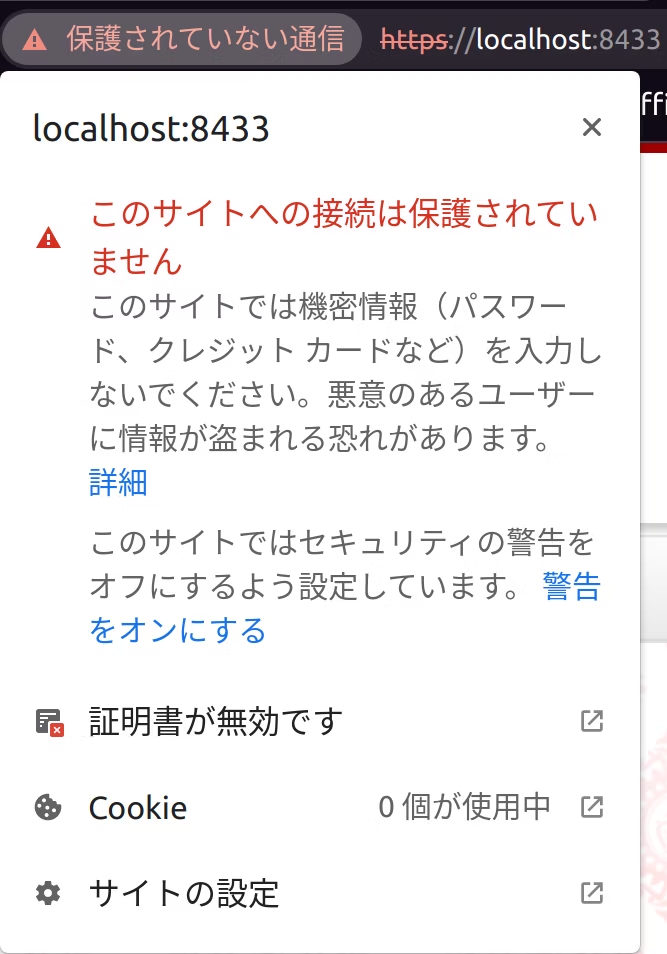
# systemctl restart apache2確認
適当なブラウザ等を開いてhttpsで通信できていることを確認する